Sunday, January 20, 2013

Gluten Free Bun at Red Robin, YUMMMM!


DELICIOUS gluten free buns from Red Robin!

Last night we picked up Tim from the airport and took advantage of being near the only Red Robin on Long Island for dinner.  We have been to a few Red Robins in the last couple of years, including the one in Carle Place and always enjoyed our meals.  After arriving last night and facilitating multiple bathroom trips and trying to get all of Ellis's food out of the diaper bag, I glanced at the menu for a second and tried to make a decision.  Thank goodness Tim is a speed reader because he was the one who noticed they now carry Gluten Free Hamburger Buns, for $1.00 more.

I usually get my burgers wrapped in lettuce when I'm there, which is nice, but messy, the juice just leaks out all over the place and makes a disaster.  I didn't have much faith that the Gluten Free Bun would be much more than edible, but was I ever WRONG!!!  It was AMAZING!!!  Soft, warm, lightly toasted, and buttered, PERFECT!  I have eaten so many hamburgers without buns in my life that this was a truly delicious experience, the bun is there to sop up all the juices and make the whole thing more edible, who knew!

Tim also noted that his Royal Red Robin burger actually looked like the picture on the menu when it was delivered to him.  I had the "Big Tavern," I think, the waitress helped me order (she told me the Tavern double is two smaller patties and almost the same weight as the Big Tavern) amid the chaos of two hungry kids, and I couldn't have been happier .  Ceci had a cheese burger without a bun, she is so spoiled!  She lives in a world where there is access to gluten free buns and she doesn't even want them, foolishness!

We will be going back for sure!  And if I have my say it will be sooner than later.

Wednesday, January 16, 2013

Gluten Free Buttermilk and Cranberry Scones


Ellis and I are sitting here at the breakfast table and I'm realizing I haven't really posted anything since he was born.  I'm nearly positive that's because he hasn't slept through the night, more than 5 times since he was born, which combined with the lack of sleep at the end of pregnancy means I haven't slept right in almost a year.  I'm happy to report (and hope I am not jinxing myself) that he has finally started sleeping through the night a little more regularly and I now seem to have more energy, go figure.

Yesterday, armed with my new found energy I was inspired to use some of the buttermilk I have sitting in the fridge and bake.  I found a recipe for buttermilk scones and could not wait to try it, I'm always so tempted at Starbucks by the pretty scones in the case.  Fortunately I can always resist them, but it's getting harder and harder, until now!!  Ceci and I made these up yesterday afternoon while Ellis was sleeping and we could hardly keep our hands off them to save them for this morning's breakfast.  Ellis even ate bits of them for his breakfast, after I picked around the cranberries for him.

I love baking with buttermilk, it gives a really nice tang to the scones, as well as a velvety moisture, making them impossible to resist.  The recipe called for cinnamon to be sprinkled on top and gave a warmness to the scones.  I realized when we were making the scones that I take a lot of language for granted with Ceci, she is 4 and a half now and communicates with us incredibly well.  I told her to sprinkle cinnamon on, and turned to put some dirty dishes in the sink, I turned back to see her hand all the way into the (costco size) cinnamon jar, and piles of cinnamon on top of several scones.  Oops, guess I should have explained the difference between sprinkle and dump, one of the scones I had to dump the excess cinnamon off.  She is a crack up!  The scones were still delicious


Gluten Free Buttermilk and Cranberry Scones

1/4   Cup Soy Flour
3/4   Cup Sweet Rice Flour
1/2   Cup Oat Flour
1/2   Cup Brown Rice Flour
1      teaspoon Xanthan Gum
1/4   Cup Granulated Sugar
4      teaspoons Baking Powder
1/4   teaspoon Baking Soda
1      Egg
1      Cup Buttermilk
3 1/2 Tablespoons Unsalted Butter, melted
1/2   Cup Dried Cranberries (or any dried berries, raisins, or chopped up dried fruits)

Preheat oven to 400 degrees (F)
Whisk dry ingredients thoroughly in a large bowl and set aside.
Mix Egg, Buttermilk, and melted butter, then add all at once to dry mix, with dried fruit.  Stir with a rubber spatula until the dry ingredients are moistened, batter will be very wet.
Using a large spoon, or a muffin scooper with a 2 1/2 inch bowl, drop batter in mounds on a silpat or parchment lined baking sheet, sprinkle tops with cinnamon.
Bake for 12-15 min, until a toothpick inserted into the middle of scone comes out clean.  Cool on a wire rack, or serve warm.
Inside view of Buttermilk Cranberry Scones

Saturday, August 25, 2012

Ceci's 4th Birthday Purple Velvet Cake


Today we celebrated my amazing daughter's 4th birthday!  About 11 months ago she started asking for a Rapunzel birthday party for her 4th birthday, so today we made that simple wish a reality.  I asked her a month ago what cake she wanted me to make and she simply shouted "purple!"  Well, I know that red velvet cake is one of her favorites, which I truly believe is because she loves the cream cheese frosting on top, so I hunted down purple food dye and made it happen.  A week or two ago I realized I could make a frying pan shaped cake so I could write a birthday message.  Yesterday I went on a dessert making rampage and created all sorts of treats, purple velvet mini cupcakes, purple velvet cake, cake pops, purple chocolate covered marshmallows, and purple chocolate dipped pretzels.  Today I dyed frosting, and myself, 3 different colors, and was pretty proud of my mess!  The smile on that sweet face made all of it worth it.

Here's to 4 years of sweet joy!  I love you my little kitten Ceci!

Ceci's dessert extravaganza!


Purple Velvet Cake with grey cream cheese frosting, made into the shape of a frying pan.
"Chocolate" covered marshmallows, and "chocolate" dipped pretzels
Purple velvet mini cupcakes with yellow cream cheese frosting, representing Rapunzel's purple dress, and yellow hair

Wednesday, July 25, 2012

Happy Coffee


For Mother's Day this year Tim got me a Keurig coffee maker, with an auto on timer to help me start my days with two kids.  I have spent the last several months taste testing several coffees and found a few I like.  Until about two weeks ago, I found San Francisco Bay Coffee company through Amazon.com.

I was so thrilled to find these coffee pods, there is no plastic cup on them!!!  So much less waste!  I was sick about throwing away those little plastic cups everyday and now I don't have to.  I chose to sign up for Amazon's subscribe and save program, where they automatically charge your credit card and ship your item on a regular basis, this brought the cost of the coffee pods down to 41 cents each, the cheapest I have found anywhere.  One more reason I decided to get this coffee with out taste testing it was that for every 1 or 2 star review on Amazon the San Francisco Bay Coffee company personally responded and offered a resolution to any possible problem with the product.

view of the bottom of the coffee pod

I subscribed to the French Roast flavor of coffee, because it is considered their dark roast.  San Francisco Bay offers 2 other varieties of coffee, I personally like coffee you can stand a fork up in.  Their French Roast coffee delivers!  I love the strong dark taste, and it's perfect with a little milk and a bit of agave nectar.  It has an amazingly rich smell, and it goes down smooth and easy. I'm very happy we found these coffee pods and I'm also glad someone thought to get rid of those plastic cups.  The only drawback to these pods is they need to be stored in an air tight container to maintain freshness, I put them in a Rubbermaid storage container I had laying around.  The good part of that is they send you 3 vacuum sealed bags of 12 pods each so you are only storing at most 12 pods at a time the others can stay in their factory bags until you are ready to open them.

P. S. My aunt just let me know that Costco in Oregon carries these pods in a box of 80 for $26.00, or 32 cents/each.

Friday, July 13, 2012

My Breakfast, Wild Flours Bakeshop


I wanted to type a nice post about my breakfast this morning, instead I'm surrounded by two adorable children who want all of my attention.  I've managed to balance Ellis on my lap and the computer on my legs with Ceci on the other side begging for wonder woman videos on youtube.  I bargained a few minutes away from wonder woman videos to write this note about my delicious coffee cake from Wild Flours Bakery in Huntington Village.   We stopped by last night on our way home from haircuts and picked up some cupcakes and breakfast treats.

First of all, it's a dedicated gluten free bakery that does not use any nuts!  They are also dairy free for those who need it.  I love walking in the door and telling Ceci she can pick anything she wants in the cases, that is a huge mommy moment for me, considering most of the time I have to negotiate with her to select one or two items that are close to safe for her.  Ceci picked a gorgeous vanilla cupcake topped with chocolate mousse frosting and some pink sprinkles, I chose a cookies and cream cupcake for dessert last night, and a coffee cake for breakfast today.  We were too greedy to stop and take pictures of the cupcakes, they were so yummy we gobbled them up.

All the cake components of our treats were so light and airy and perfectly sweet.  The vanilla cake is almost to delicate to hold up the sinfully rich chocolate mousse frosting, but somehow gets the job done in the most delicious of ways!  My cupcake had a light chocolate cake, again light, airy, and delicate, with the perfect flavor of chocolate.   The icing on my cupcake was more of a ganache than a frosting which I suspect comes from the lack of dairy, and was a bit purpley-grey from the cookie bits being blended into it.  Now ask me if I was bothered by any of those issues after the first bite, my answer is NOPE!  I ate the whole thing!  This morning I got the joy of a beautiful coffee cake that I did not have to make.  The topping was so crumbly, with the perfect balance of sweetness and cinnamon, on top of the again, delicate, airy and sweet, dry cake.  I loved it!

Maybe I'm glad it's a bit of a hike to the bakery, so I can save it for when I really want to go, otherwise I would weigh a million pounds.  Everything is always yummy there and it is so hard to choose just a few treats when we are at the counter.  As a person who has been gluten free all my life, there is such a beautiful happiness seeing an entire bakery case full of treats that are totally safe for me to eat.  I said it earlier, but it's worth repeating, taking Ceci into a bakery where everything is safe for her to eat, makes my heart so happy, seeing the huge smile on her face as she runs to the glass case and presses her tiny button nose against it to choose the most beautiful treat she can find.

We are so happy we have found Wild Flours Bakeshop!

Ok, back to Wonder Woman videos!

Thursday, May 3, 2012

Announcements and Apologies


I would like to apologize for my lack of posting in the last few months, I am sorry.  I would also like to announce the reason for my lack of posts, on April 3, 2012, we welcomed Ellis Yung-Tsun into our lives!  I had a beautiful healthy baby boy, 6 lbs 8oz, 20 in.

Since his birth I have been in a total fog trying to keep up with his eating habits day and night, so typing on the computer has been hard to do.  Hopefully as he settles into a schedule and doesn't need to eat every 20 min (it just feels that way) I can get back to cooking with Ceci and posting our creations here.

We feel so fortunate to welcome Ellis into our family.  Thank you for your patience in this exciting time in our lives.

Friday, March 16, 2012

Timing is Everything

This last week I was contacted by an amazing woman, Heather, who has an incredible story to tell with a beautiful outlook on life.  She was so kind as to write a guest post for me, while it doesn't directly correlate to Celiac/Gluten Intolerance it does relate to handling what life gives you.  It also relates to being a mother, which is certainly a part of this blog, and always welcome here.  Please read, and please encourage your friends and family to read more of Heather's story and philosophy on her blog at http://www.mesothelioma.com/blog/authors/heather/.  A huge Thank You again to Heather for sharing her journey.


Heather and Family

Timing is Everything
By:  Heather Von St. James


Ineffable, funny sounding word, it’s an adjective with the definition of unable to be expressed in words. Most people can conjure up an adjective to describe any situation life puts in front of you. But alas, there is still one situation that can never be put into words to describe the feeling of it. Cancer, yes cancer, the real “C” word, which was introduced to me first hand on November 21, 2005, roughly four months after the birth of my one and only child. How’s that for timing? You’ll see that timing is a theme of this life episode.

Why would life do this anyone, to me!? Blessed with a new child to care for and now I’m to conquer the big C, malignant pleural mesothelioma to be exact. Why now? Why ever? But I wasn’t going to beat down by any disease. I’m strong, I’m now a Mother and I’ve got a life to live beyond my own. I turned cancer on its head and decided to not be the victim but to accept this challenge with my head held high. Being referred to one of world’s leading mesothelioma doctors, who was able to give me continued hope that I could beat this thing; kept the fire burning in me to beat it.

So did having a sense of humor about it, very important to this ordeal, I could only laugh when realizing that the date of my surgery to remove the tumor was on Groundhogs Day, 2006. We renamed Groundhogs Day, Lungleavin Day, since it was the day my lung left, and every year on the first weekend of February, we have a party to celebrate Lungleavin Day. No seeing any shadows this day. We celebrate the bright light of hope and life.

The big “C” is not so scary, in many ways I’ll be eternally grateful for this challenge that I overcame and lived though. My life has a bigger purpose now, more direction. I didn’t take the birth of my child for granted but there is a pureness to my love of motherhood now, because it could have easily been taken away from me. Proudly I’m now in a special club of beautiful and strong warriors, current battlers and survivors of cancer, their supporters and nurses and doctors who dedicate their lives to beating cancer and bringing more awareness to this disease.

In life, timing is everything. And now I simply approach each day with the joy of being alive and enjoying it, because any day could be your last. Cancer, you’re strong but I’m stronger and wish great strength to any other warriors battling cancer, call me, I’ve been there.

Monday, February 13, 2012

Ceci's Valentine's Treats

Ceci enjoying her hard work when all the dipping was done
Last year I went on a Mom's Night out to a chocolate shop here on Long Island called The Chocolate Duck and had a great time making tons of chocolate goodies with some fun ladies.  This year I didn't go but was missing the treats, and last year it was tough anyway because the had us make a lot of things with nuts which I gave away to friends, family, and teachers.  One of the favorite items we made was an accident that my friend Sheri and I made as a last ditch effort to use up more of the melted chocolate, we dipped the potato chips from the snack table into the chocolate.  Everyone I gave them to RAVED about them afterward.  Tim would have eaten the whole batch of them if I hadn't hollered at him not to.

So this year I decided to make chocolate dipped treats at home, but with Ceci helping I needed to keep them nut free.  I bought Hershey's Chocolate Chips and melted them in the double boiler, and we dipped all sorts of yummy things pretzles, chips, ghram crackers, anything really.  We even made nut free clusters using dried edamame beans and craisins, chex and crasins, and for Tim I made cheerio clusters (in a separate bowl).  Ceci had a great time and was really good about being careful of the warm pan and even learned a new word, Generous.  She had trouble understanding that we should put more than a dot of chocolate on each item, so I explained that each item needs more chocolate so it tastes better and our friends and family like them more.  She was so adorable after that, each time she dipped she would show me the item and say "Mommy, this is generous!"  Yes my love,  You are generous!

It made for a super fun afternoon and an easy way to make treats for lots of people.


Saturday, February 11, 2012

Gluten Free Beginet with Amaretto Honey
I was just marking the calendar for February and noticed that Mardi Gras is coming up.  I had made these Beignets last year, but it was several days after Mardi Gras and I never got around to posting about them sadly.  I thought I would get them up in time for this year's celebration.  They came out beautifully, and our friends who helped us eat them thought they were fantastic, and they can eat gluten.  I take that as high praise when someone who can eat gluten thinks gluten free foods taste great, or even better than the glutinous version.  It was also fun to make them for Ceci since one of her favorite movies is Disney's Princess and the Frog, featuring Tiana a struggling waitress in New Orleans who is famous for her beignet recipe.  

I have never been to New Orleans myself so I can't speak to the authenticity of the taste of these beignets, but if these don't taste authentic, I think that's okay because they taste DELICIOUS!!!  

I borrowed this recipe from About.com where the recipe called for a gluten free cake mix, I didn't have a cake mix in the house and was too lazy to go buy one so I subbed in Gluten Free Bisquick.  I was more than happy with the results, I like that the beignets were not over poweringly sweet, I believe the cake mix would have made it too sweet.  Everyone else eating them that night agreed that they liked this version too.  


A few Christmases ago I bought my husband a Cool Daddy Fryer for home so we could over indulge ourselves even more, and we used it to fry the beignets perfectly.  

I put out lots of different options as toppings, but the amaretto honey was the hit of the party.  Friends gave me flavored sugars for a past birthday and I had those out, vanilla sugar, cinnamon sugar with cardamom, and powdered sugar.  In my opinion any form of sugar is delicious, but the honey did bring them to a whole different level of yummy-ness!


Gluten Free Beignets

2       Cups Gluten-free Bisquick
1 1/2 tsp dry active yeast
1/8    tsp salt
2       Tbs granulated sugar
1/3    Cup lukewarm water
1       lightly beaten egg
1/6    Cup milk

Extra tapioca starch for rolling out dough
Canola or Vegetable Oil
1/4 to 1/2 cup confectioners sugar, honey, or cinnamon sugar

Combine gluten-free Bisquick, yeast, salt and sugar in a stand mixer, blend on slow just to mix the dry ingredients.  Add water, egg and light cream and mix until thoroughly combined. The batter should be thick and shaggy. If it's too thin add more Bisquick, 1 tablespoon at a time.  Scrape batter onto a large rolling mat or work surface. Use your hands to knead dough to form a ball.  Place the ball in an oiled bowl with a tight-fitting lid and refrigerate overnight.  When you are ready to fry your beignets, take the dough from the refrigerator and place on rolling mat or work surface that's liberally dusted with tapioca starch. Punch the dough down and work in enough tapioca starch to prevent the dough from sticking to the board. Roll the dough 1/2-inch thick and use a sharp knife, dipped in flour, to cut 2-inch squares or diamonds.  Use a floured spatula to place the cut pieces on a floured baking sheet. Let rise for 30 minutes.  Pour 2 inches of oil in a heavy saucepan or follow manufacturer's instructions for a home frying unit. Heat to 375 degrees F. Use a spatula to transfer the beignets to the frying pan. Deep fry beignets in small batches. Turn when golden and fry just until second side is light, golden brown.  Use tongs or a slotted spoon to transfer beignets to a paper towel-lined plate to drain. Liberally dust with confectioners sugar, cinnamon sugar, or drizzle with honey. Serve hot.


Sunday, January 29, 2012

New Gluten Free Store


I'm so excited to say that we found a wonderful new Gluten Free Store!!  It's called Strictly Gluten Free, and it is just that, an entire store dedicated to gluten free products!  Not just a small shelf in the back of items that don't get rotated, that's right an entire store of gf food, beauty products, books, and more.

The store is pretty small, but super clean and well lit, it makes it feel so much bigger than it really is.  It is in a tiny strip mall on Larkfield Rd. in East Northport Long Island.  The owners were there working and Steve even opened the door to greet us as we came in from the parking lot, his wife Angela was there with their baby Luca in a carrier and they were all so warm and welcoming.  Angela is the gluten intolerant one, and told us they have done tons of research and traveling to different gluten free expos around the country to seek out the best of the best gluten free products.  She said she has tried 95% of the products in the store and wouldn't stock it if she didn't like it!  Let me tell you, this was music to my ears, I despise wasting money on bad gf products!!!  There is never any reason that someone with celiac can't have delicious food, and I loath when companies think it's okay to sell us bland, dry, tasteless products and over charge for them.  Well, that won't happen here!  Steve and Angela have done their homework!  They had the best of the best products all in one place, all of my favorites so I don't have to run all over the countryside gathering things I like.

After chatting for a few minutes I asked Steve if they had the gf Chinese Dumplings we have been desperately searching for for months now.  He eagerly told me to follow him and that they not only had the dumplings but had a good stock of egg rolls too!  Ceci is so jealous of Tim's dumplings when he eats them for lunch and we had found Feel Good Foods online but had yet to see them in stores.  Finally a store close to us had them!!!  So excited!


Did I mention they have samples??  We went Saturday afternoon and they had taken a delivery of some beautiful baked goods from Ms. Michelle's Urban Gourmet, including lots of beautiful muffins and cupcakes.  I think Ceci must have had at least 4 samples, and you know she doesn't waste her time on food that isn't delicious.  I think her favorite was the chocolate muffin, with chocolate chips on top.  All of the Ms. Michelle's products were fresh baked, not frozen.  


Angela also offered us samples of Soft Gluten Free Pretzels from Tonya's Gluten Free, they were Amazing!!  I've never seen them in any stores around us before and that makes me sad.  They are so buttery and delicious and come with toppings, salt or cinnamon sugar!  We bought a box of those and I can't wait until snack time to dig into them!

The store also carried Goldbaum's ice cream cones, which I've had before and really liked, but Tim went back and took a second look and realized not only did they carry sugar cones, but Coco Sugar Cones!!!  That's something new!  I don't think I've even seen those in a glutenous version.  I had one last night with vanilla ice cream and it was fabulous!  Perfectly sweet and chocolate, a great way to add more deliciousness to my ice cream.  I can hardly wait to give Ceci her first ice cream cone all to herself and see what she thinks.

If you live anywhere near this store, PLEASE go visit it!  They are wonderful people and have stocked the best products!  I want them to be successful so I don't have to drive to 4 stores to collect all my gluten free products!

Monday, December 5, 2011

Gluten Free Gingerbread Cookies

"Oh No!  Please don't eat me!"  Ceci helped with this one, makes me laugh.


I love holiday time!  I was so fortunate to grow up with some wonderful family traditions, like decorating gingerbread houses with our family friends.  My brother and I would so look forward to this event every year, because we got to see our friends, the Arndt family, and eat candy till we burst.  Another favorite holiday tradition was the Safeway Bakery Cookie Bake, with my dad's entire family.  My grandma worked for the Safeway Bakery and once a year the company shut down the bread making process for a day and invited all the worker's families in to bake cookies.  They sold dough (glutinous of course) in 10 lb lumps of either sugar or gingerbread, and gave you HUGE cookie sheets to run them through their ovens.  It was fantastic, even if there was gluten, I just loved being around everyone and the smell of delicious cookies and holiday music filling the air of this enormous factory.

Now that I'm grown and have my own family, and live far away from my parents, I work very hard to build traditions for us.  We are so lucky to have wonderful friends who love to be a part of our traditions.  I have been doing a gingerbread decorating party for a few years now, and really enjoy it.  Last year I made the houses out of Gluten Free Gingerbread and was sorely disappointed!  So this year I went back to making the houses out of cardboard, it's so much easier!  I figure that no one actually eats the house in the end because it's so stale and awful, so why not start with a sturdier easier method.  I felt guilty for making the houses cardboard, and then made a two batches of Gluten Free Gingerbread cookies to send home with our guests.  Plus it gives something else to decorate at the party besides the houses.

I couldn't be happier with the way the cookies came out, I prefer soft, thick cookies, and these are perfectly spiced with a touch of sweetness, and are even more delicious when you add powdered sugar icing on top.  I make my icing with orange juice so it adds a citrus flavor to complement the perfect spiciness of the cookies.  I also crumbled the cookies over my bowl of egg nog ice cream last night and was very happy.  I think I would eat them for breakfast too, if I didn't have a 3 year old watching my every move, being responsible doesn't always taste good.  Ceci loves the cookies too, sneaking nibbles of the dough while we are cutting the cookies.  She really enjoys the decorating part too, I love that she just wants to sit and decorate for so long, it's wonderful, I think she has more patience for it than I do some times.

I do have to warn that I wouldn't use this recipe to make a gingerbread house, it's too soft of a dough to hold up to the structural demands of decorating.  Plus it tastes delicious and who wants to waste that on a house that no one eats.

Can you guess which one Ceci decorated?  


Gluten Free Gingerbread Cookies

1/3   Cup Soy Flour
2/3   Cup Brown Rice Flour
1      Cup Sweet Rice Flour
1      Cup Tapioca Starch
1 1/2 tsp Xanthan Gum
1 1/2 tsp Baking Powder
3/4    tsp Baking Soda
1/4    tsp Salt
1       Tbs Ground Ginger
1 3/4 tsp Ground Cinnamon
1/4    tsp Ground Cloves

6      Tbs Unsalted Butter (softened)
3/4   Cup Brown Sugar (packed)
1      Egg
1/2   Cup Dark Molasses
2      tsp Vanilla

Preheat oven to 375 degrees (F), and prepare 2 baking sheets lined with silpat or parchment paper and set aside.  Pick out cookie cutter shapes to use.

Wisk together dry ingredients in a mixing bowl and set aside.  Cream Butter and Brown sugar on medium speed in a stand mixer until combined.  Add egg molasses and vanilla and beat until incorporated, scraping down the sides of the bowl if needed.
Gradually add in dry ingredients until well blended and smooth.  Divide dough in half, wrap in plastic and allow to rest at room temp for 2-8 hours.  Dough will be incredibly soft at first and will firm up when left out.
Working on a lightly floured surface roll out one ball of dough to 1/4 inch thick and cut out cookies, place the cookies on the prepared baking sheets and bake in oven for 5-7 minutes, depending on the size of the cookies, and preferred doneness of cookies.  Gather the dough scraps and re-roll and cut until all the dough is used, or dough is to tough to roll out.  Repeat rolling, cutting and baking for the second ball of dough.
Allow cookies to cool completely and then frost and decorate with Powdered Sugar Icing Recipe.  After the Icing hardens you can pack these cookies up into pretty boxes and give to friends, just remember to separate layers of cookies with wax paper so they don't stick to one another.

Powdered Sugar Icing

2   Cups Powdered Sugar
1 1/2 Tbs liquid (milk or orange juice, I like the flavor of orange juice with the cookies)

Mix in a bowl until smooth.  Adjust consistency as needed by adding more powdered sugar or liquid.  Add food coloring and place into a piping bag, or a zip top bag with a bottom corner cut off.  Decorate cookies as desired, and ENJOY!

Friday, December 2, 2011

Gluten Free TV!


Last night we watched ABC's "Man Up!", it was an episode about a whole family starting a gluten free diet.  It's not a show we normally watch, but Tim had seen the write up in TV Guide and DVR'ed it for us.  It was pretty funny!  The banter was great, although they didn't have the greatest grasp on what was gluten free and what wasn't, at one point suggesting that potato chips and gummy bears had gluten.  Still it was fun to see them make gluten intolerance entertaining.  I think one of my favorite exchanges was:

"Gluten, isn't that the stuff in light bulbs?"
"No."
"Oh, gluten, you mean Aquaman's nemesis!"

Awesome!!  Because there have been a good many days of my life time where that's how I felt trying to explain gluten and why I can't consume it.

Anyway if you have 24 minutes or so, and are looking for something funny, check it out.  Here is the link

ABC's Man Up! Disciplining the Keens, through ABC.go.com

and Man Up! Disciplining the Keens, through Hulu.

Saturday, November 26, 2011

Gluten Free Beer Battered Fried Fish


Delicious Fish and Chips!

Last night Tim (my husband) made us an AMAZING Beer Battered Fish and Chips for dinner!  I asked him to write a guest post for the blog, I will warn you he has a VERY different cooking style than I do.  We joke that I'm a scientist and he is an artist, because I HAVE to measure everything and have a plan, he on the other hand, adds a dash of this and a pinch of that and it comes out perfect.  I cannot cook the way he does, and he can't comprehend cooking the way I do, and that's how we get fed around here.  So here it goes, I hope you enjoy Tim's cooking too!

Tim's Gluten Free Beer Battered Fish

I always get inspired to make things that are typically quite gluten filled, and then I adapt them for a gluten free meal.  The other night, I was really in the mood to deep fry, and we were having a couple over for dinner, who always give me lots of liberty to experiment. They suggested Fish and Chips.

For the Chips, I used a pretty well known and standard recipe. Cut the potatoes, wash off the starch, and then pat them VERY dry. Fry them at 375. Take them out, drain them on a rack, and then fry them again. Season liberally, before the oil dries. That's easy.

So, I decided to make a beer batter. After Googling regular beer batter recipes, and then gluten free recipes, I adapted, and made my own. I made a test strip, tweaked the batter, and made a second, which was pretty perfect, and highly praised by all who sampled.
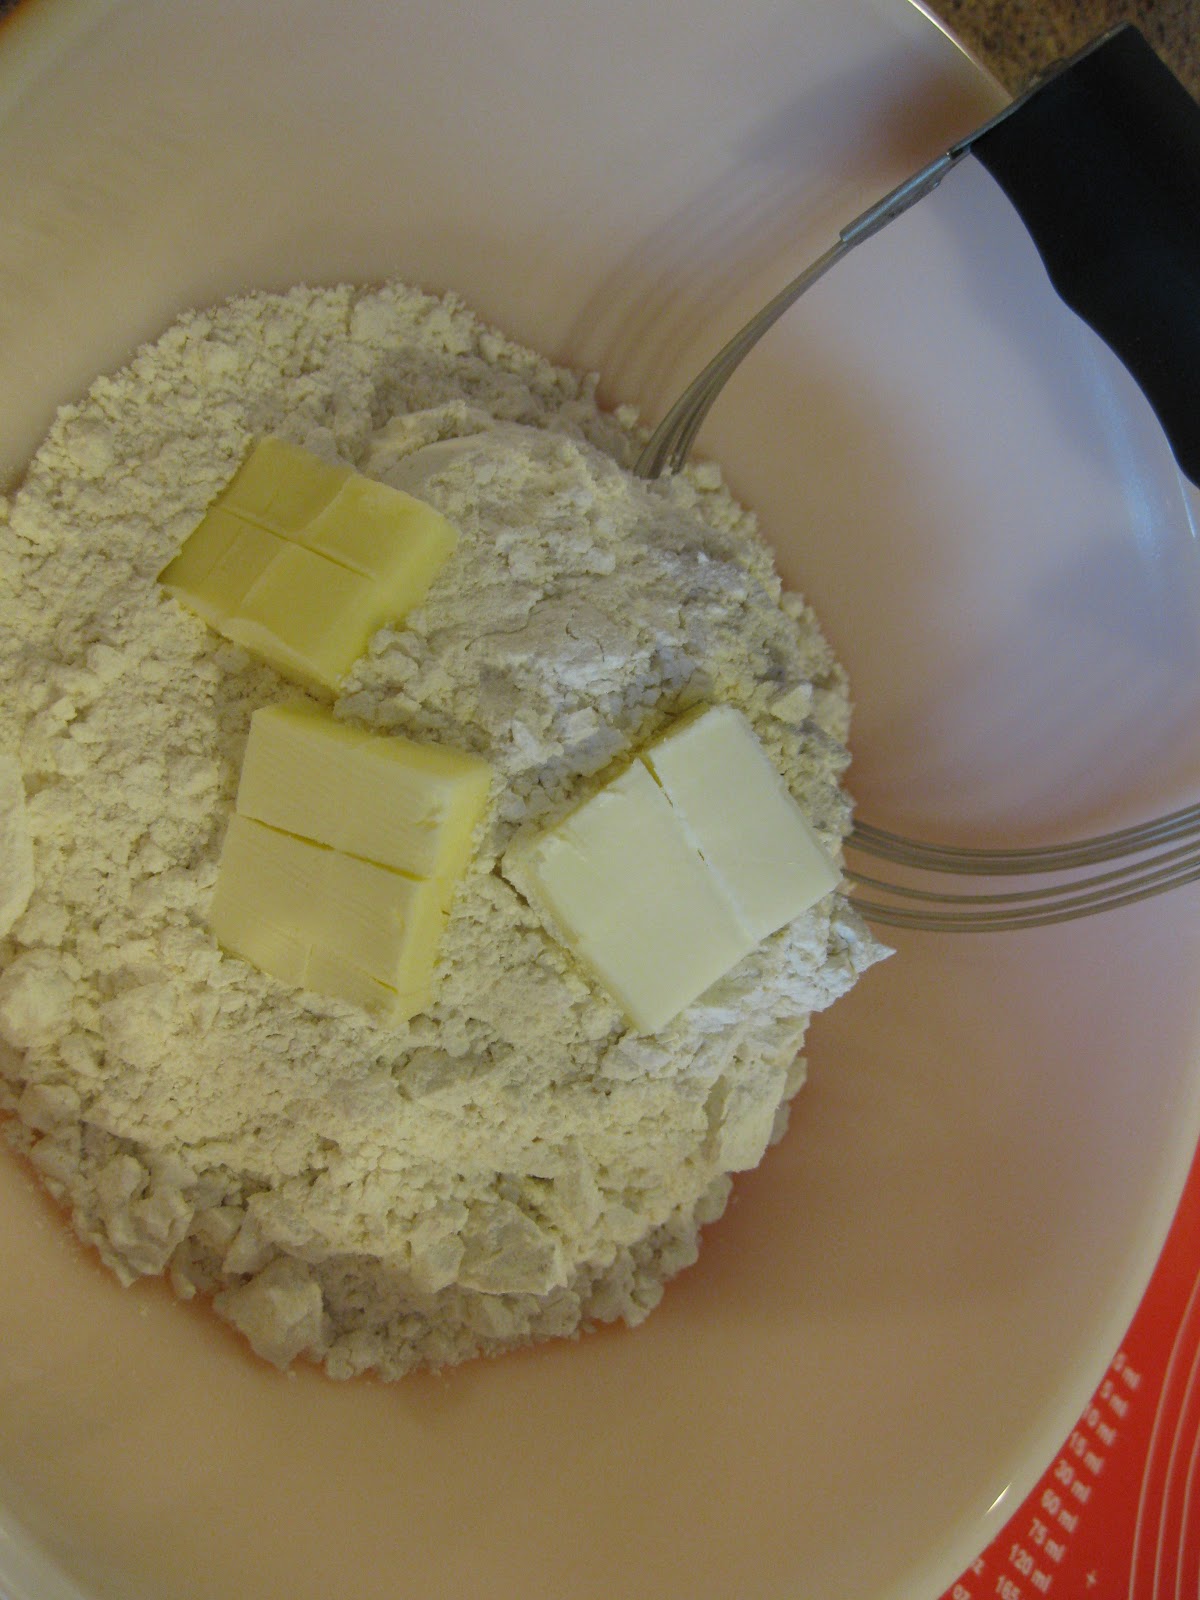
Here’s what I did:

8 tilapia filets, sliced in half, lengthwise, separating the thinner ones and thicker ones in two separate piles, so when I fried them, they’d cook evenly. I did not want to mix and match the thicknesses, and end up overcooking the thinner ones.

The beer batter was:
1 cup of sweet rice flour, Paprika, Kosher Salt, Ground White Pepper, Ground Black Pepper, (I have a mill for the black pepper, but I like the store-bought ground white, because it’s a super fine ground.) I don’t really know how much I put in. I put in more than I thought I would. Then, after the first test strip, realized it needed quite a bit more. So I added more.

I mixed all the dry ingredients. Then, I took 1 egg, which I beat in another bowl, first. And then mixed in the egg, and whisked that.

Then I whisked, while slowly adding in the beer. I used a whole bottle of ice cold New Grist, right out of the fridge.

I covered the fish strip in tapioca starch, shook off the loose starch, and then immediately dropped it into the batter, swooshing it around to get full coverage, and put it into the fryer, into vegetable oil at 375 degrees, almost still dripping. The consistency of the batter was so thin, you could almost see the fish in there, under the batter. Andrea was concerned with the thin-ness of the batter (as was I, but I didn’t voice it), but it worked.

We have a Fry Daddy fryer, so it fit 3-4 strips comfortably in the basket, without touching each other. I fried until they were golden brown, took them out, and drained them on paper towels, flipping to drain both sides. That was it!

In between each batch, I re-whisked the batter to keep it from separating.

The four of us finished almost all but two of the thin strips, which means four people ate 3.5 pounds of fish. I’m making a note here: huge success!

Wednesday, November 16, 2011

Gluten Free Red Velvet Cupcakes

Gluten Free Red Velvet Cupcake with Cream Cheese Frosting

At some point in the last year I attempted to make Red Velvet Cupcakes, well Green Velvet anyway (I'll explain in a second), and did not like them.  Recently I was inspired to try them again, and looked up a new recipe, I am currently obsessed with them, and so is Ceci!  She can't get enough of them, when we had them she asked to eat one constantly, I had to bargain with her so she wouldn't try to eat all of them at once.  I was really pleased with the taste and tenderness of the cake, and who doesn't love cream cheese frosting to top off everything??

It turns out that there were a lot of problems with my first attempt at Velvet Cupcakes and subbing green food dye for the red was the least of the issues.  My husband thought for years that he was allergic to red dye, from some incident back in his college years, and until he saw the allergist this year we just avoided all forms of red dye.  The Dr told him that it was a made up allergy and he had never heard of it in all his years of practice.  So now I can use all the red dye I want in cupcakes.  The other major issue with the first batch of cupcakes was the recipe used oil instead of butter, so they came out greasy and unappealing, even the cream cheese frosting couldn't save them.

You can understand why I was hesitant after that disaster to try Red Velvet again.  Like I said previously I was inspired, I had purchased buttermilk to use for Pumpkin Whoopie Pies and had left over so I thought hard about other recipes that use buttermilk and came up with Red Velvet Cupcakes.  After some research I found what looked like a good recipe and worked to convert it over to Gluten Free.

We took them to a 2nd Birthday/House Warming Party for some family friends, one of the other guests had brought lots of fancy mini cupcakes from the famous bakery in NYC, Crumbs.  He told me he preferred my cupcakes to the fancy store bought ones!!!  That makes my day!  Having people who can eat gluten tell me that my gluten free versions taste better than the regular ones, especially when they are saying it's better than expensive boutique cupcakes!

I hope you enjoy them as much as Ceci does!

Red Velvet Cupcakes:

1 1/4 Cup Sweet Rice Flour
1   Cup Tapioca Starch
1/4 Cup Soy Flour
1  tsp Xanthan Gum
1/2  tsp Salt
2  Tbs Coco Powder (Dutch Processed)
1/2  Cup Unsalted Butter at Room Temperature
1 1/2 Cup Granulated Sugar
2   Eggs
1  tsp Vanilla Extract
1  Cup Buttermilk
2  Tbs Red Food Coloring
1  tsp White Distilled Vinegar
1  tsp Baking Soda

Preheat oven to 350 degrees (F).  Line about 20-24 cupcake tins with paper liners and set aside

Mix flours, xanthan gum, salt, and coco powder in a mixing bowl and set aside.  Cream butter and sugar in stand mixer, add eggs and vanilla, and beat well to combine, scrape down the sides of the mixer after ingredients are well combined.  Measure buttermilk, and wisk red food dye directly into buttermilk.
With the mixer on low speed, alternately pour the flour mix and the buttermilk mix into the mixer, beginning and ending with the flour.
In a small cup, combine the vinegar and baking soda, allow it to foam, and then quickly mix it into the cake batter.
Quickly portion the cake batter into the prepared pans and move to the preheated oven.  Bake cupcakes for 18-20 minutes or until a toothpick inserted into the middle of the cupcake comes out clean.
Let the cupcakes cool for several hours before frosting them.  Use Cream Cheese Frosting to top them with.  You can cut the frosting recipe in 1/2 so you don't end up with a TON of frosting.


Wednesday, November 9, 2011

Gluten Free Apple Turnovers


First Attempt:
I've had a box of Orgran gluten free puff pastry mix sitting in the cabinet for months now, waiting to be used.  While the weather was so hot, I didn't even want to think about playing with a temperamental dough that MUST be cold to function.  Just the last few days have been beautiful early fall days here in New York, which inspired me, I bought a small bag of apples at the store the other day and it all came together for me, apple turnovers.  We had a family dinner date tonight, and I almost always bring dessert, so it was perfect, Tim was home all day to take care of Ceci while I devoted my time to handling the puff pastry.  It took me about 4 hours total to make 8 turnovers, but they were worth it, and it was the first time I have ever made turnovers so I think there is a huge learning curve there.
Second Attempt:
The box comes with good instructions on it, I was able to follow them very easily, and come out with a beautiful dough.  I must admit that the first time I used the mix, I was pretty tired and used poor math to calculate the amount of butter needed for the mix.  Only half the butter made it into the dough and resulted in a rather tough end product.  The second time I made it I used the full correct amount of butter and they were much better tasting, crispy, crunchy on the outside and nice on the inside.  Both times I made them it looked like Frankenstein had tried to make the turnovers, but it didn't hurt the taste at all.  I would advise you eat them as soon as possible, as the dough does get tougher over time, but 30 seconds in the microwave and a little ice cream never hurt anything either right??

Again I will warn you they are A LOT of work, for only a few turnovers.  I did make mine pretty big, maybe next time I will chop my apples smaller so I can make smaller turnovers.

Box of mix, with instructions on the back
This is the box I purchased at the store.  The instructions on the back are good, but you should read them a few times to get a good understanding of what they are saying before you dive into the project.  It also offers a Vegan Option for making the dough on the box.


Gluten Free Apple Turnovers

1 Box of Orgran All Purpose Pastry Mix
2+1/4 Sticks of Unsalted Butter
8.2 oz Soda Water

2 Medium Apples diced small
1/4 Cup Granulated Sugar
1/2 tsp Cinnamon, ground
1/8 tsp Cloves, ground
dash of salt

Mix Diced Apples, sugar, cinnamon, cloves and salt in a bowl and allow to rest while working the dough.


(Directions from back of Orgran Box)

1.  Cut 1 oz of butter into Pastry mix with pastry cutter


2.  Make a well and pour in the 8.2 oz of soda water


3.  Mix until well developed dough is formed.


4.  Cover dough and allow to rest for 10 min

5.  Roll out the dough to a rectangle shape so that it is 3 times as long as it is wide and approximately 1/4 inch thick.


6.  Thaw the 2 sticks of butter so it can be easily smeared over the dough, do not melt it, just soften it slightly.  (The instructions say to roll out the butter between two sheets of wax paper, I found this step really difficult and decided the second time around to soften the butter instead.)


7.  Smear the butter on 2/3 of the dough.


8.  Fold the remaining 1/3 of the dough over the butter and then fold again to completely cover the butter.  This is #1 half turn.


9.  Rotate the dough so the seam is on your right.  Repeat the folding process by rolling out the dough into a rectangle again.  This is now #2 half turn.

10.  Give the dough a total of 6 half turns.  cove and rest the pastry in the freezer for 15 minutes after every 2nd turn.

Preheat the oven to 350 degrees (F).

After you have rolled out the dough for the last time, cut it into 8 equal squares (I still can't master this step, that's why mine are not pretty.)  Place a small amount of the apple mix in the middle of the square and fold one corner over to the opposite, on the diagonal.


Pinch the seam closed with fingers or a fork if you like, just make sure it is tightly sealed so the juices won't leak out.  Repeat until all 8 are made, placing them on a silpat or parchment lined baking sheet after they are sealed.


Cut a few tiny slits in the top of each turn over to let steam out so they don't explode in the oven.  Place baking sheets into the preheated oven and bake for 20 min.


Allow to sit on baking sheet for a few minutes before transferring to a cooling rack.  You can eat them when they are still warm, just be careful not to burn your mouth.  Enjoy!