Friday, December 10, 2010

Gluten Free Gingerbread House Disaster

Does anyone know if there  is a Gingerbread version of "Habitat for Humanity"?  I think the Big Bad wolf has come and attacked my little house!  If this wasn't so funny to me it would be shameful!  I don't think I will be posting the recipe for this one until I work out some more kinks, fragile doesn't even begin to describe this one.

I was so excited to make Gingerbread houses for Christmas this year, Ceci is at a perfect age to enjoy helping decorate if only for a few minutes.  Then this happened!  I made the dough, cut out and baked all the pieces, cooled them and let them get "stale" so they wouldn't collapse.  I put the pieces away overnight and got them out this morning, making molten sugar for the glue.  I couldn't work fast enough, as the sugar got more difficult the pieces began to crumble more and this roof piece was the last to go on and obviously the most damaged.

At some point in my life I may learn to be less stubborn, but I don't know that it will be any time soon.  Gingerbread house making was a family tradition for my family growing up, we always went to the Arndt house and had so much fun.  I know it took Sue years of trial and error to perfect her recipes and techniques.  Why on earth I thought my learning curve would be any different is beyond me.  In the meantime I have Sheri bringing a box of regular Graham crackers tomorrow to make fake Gingerbread houses, they won't be GF, but it will be fun.  And even if this house does survive until the party it's current hideousness won't matter after it's covered in icing and candy.

I'll let you know if it makes it and post the pictures after we get them decorated.


At least half of one house looks presentable.

Recovery!  This is the side with the hole in the roof, no one would have ever known.

This is Ceci's side of the house, I did make the gingerbread girl for her.

Tuesday, November 30, 2010

Gluten Free Chicken and Dumplings

Chicken and dumplings with mixed veggies


I'm so proud to say that starting this blog has created a fantastic dialogue between my parents and I!  A few weeks ago my mom emailed me a recipe from their dinner, but no picture with it.  Of course this means one thing, I need to make the dinner myself and take pictures!  Yumm!  This was a fabulous way to use up leftover rotisserie chicken, but I think it might be a nice candidate for leftover turkey too.  I'll let you know how that goes.  I also added a huge amount of frozen mixed veggies to make it a one pot meal, it was a little more like a chicken pot pie, but it was amazingly delicious!  The gravy is velvety smooth, and the biscuits on top just make a perfect topping to the dish.  I also used about 3/4 of a roasted chicken instead of the 2 cups Mom used.  This is definitely one of those dinners that you can play with and add all sorts of things and make changes just to see what happens.  And DO NOT open the lid on the pot once the biscuits are in!  Like Ceci says "NO peeking!"


Here is Mom's email to me, I thought it made a nice sort of guest post so I left it unedited.  

Hi Sweetie,
Thought I would share my quick cook Chicken and Dumplings with you.  It took about an hour to put together but could be shorter depending on your stove.  There is no substitute for Little Grandmas or Sue Arndt's versions but it is pretty close considering how fast it went together and I didn't have to man the stove all day while the chicken cooked in the pot.  Your dad loved it!   XOXO Mom


Biscuit/Dumplings


1 C GF Bisquick mix
3 T shortening
1/3 C milk
1  Egg
Cut shortening into mix, using a fork or dough blender till particles are the size of small peas. Stir in remaining ingredients until soft dough forms.  Set aside and start gravy.

Biscuits ready and waiting


Broth/Gravy


4 C water
4 T cornstarch
1 T chicken base "Better Than Bouillon"  (a product I love and get from Costco)
2 C cut up cooked chicken (I used leftover Costco chicken)
3 C frozen mixed veggies
Salt and pepper to taste

Chicken and veggies ready for biscuit topping


Dissolve cornstarch in the water and pour in large deep frying pan as the water is heating stir in the chicken base.  Continue to stir and as the broth thickens add the chicken, and veggies and heat through.
As broth is hot and bubbly take biscuit dough and form into balls and then gently flatten before you lay them on top of your broth/gravy.  Once you have used all the dough cover the pan and let the heat and steam cook the dumplings, about 20 min.  You can tell if they are done by taking a fork and scraping the top of a dumpling and it is no longer doughy inside. 

Finished product in the pot, with a few portions out already

Friday, November 19, 2010

Gluten Free Pumpkin Scones

Gluten Free Pumpkin Scone with golden raisins and topped with maple sugar

Today I decided I couldn't wait any longer to try this recipe, I love the fall, and I love pumpkin themed food.  I dislike that I can't just walk into a donut or coffee shop and grab a pumpkin muffin, or donut, or some other yummy baked good and enjoy it.  But after making these scones today I won't have to be sad about that ever again, I will only have to be sad when I run out of them and have to wait the 15 minutes for the oven to finish baking.

The scones have a great dry crumbly texture which goes beautifully with a cup of coffee, and the pumpkin is a perfect compliment to the gluten free flours, its as if they were made for one another.  I also love the level of spice, it fills your nose with all those happy fall smells and aromas, the house smelled so good when these came out of the oven, I can't even explain how happy it made me.  The golden raisins are nice too, they add a nice texture to the perfect scones.

I found this link, Andreasrecipes.com, on the list created by Shauna, the Gluten free Girl, Gluten Free Thanksgiving.  Andrea Meyers wrote a lovely story and recipe for these scones and it made me want to make them even more.  She used Bob's Red Mill GF All Purpose Baking Flour, which is great if you have it on hand, or don't have a variety of flours to utilize.  Sadly I can't find it in a large enough quantity, or for a decent price here on Long Island, and I enjoy mixing and matching my own flour combinations.  If that all sounds a little intimidating, then by all means use the Bob's All Purpose Flour, I love it when people bake gluten free, but if you are at all intimidated don't stress, keep it simple and use one of the many premixed flour options out there.

I can hardly wait to make these again for my parents to enjoy, Tim has suggested we should add a little drizzle of powdered sugar icing when we make it next.  That makes me happy, the more sugar the better!    I'll let you know how that works out.  Tell me if you can think of any other add-ins or changes that I can use to tweak this recipe, I know I will be making it again in the next couple of months.

Adapted with permission from Andrea Meyers.

GLUTEN-FREE PUMPKIN SCONES

Makes 8 scones.
Equipment

food processor with blade attachment
small bowl
large mixing bowl
baking sheet, greased or lined with parchment paper

Ingredients

1/4 Cup Soy Flour
3/4 Cup Brown Rice Flour
1/2 Cup Sweet Rice Flour
1/2 Cup Tapioca Starch
1/2 teaspoon xanthan gum
1/3 cup (58 g) granulated sugar
1 teaspoon gluten-free baking powder
1/4 teaspoon baking soda
1/2 teaspoon salt
1/2 teaspoon ground cinnamon
1/4 teaspoon ground ginger
1/4 teaspoon ground cloves
1 stick (8 tablespoons/113 g) cold unsalted butter, cut into small pieces

1/2 cup (120 mil) pumpkin puree
1 large egg
1 teaspoon vanilla extract
1/2 cup (50 g) raisins or golden raisins

milk
cinnamon & sugar mix

Preparation

1. Preheat oven to 400° F/200° C.

2. In food processor bowl, mix the flour, xanthan gum, sugar, baking powder, baking soda, salt, cinnamon, ginger, and cloves. Add the pieces of butter and pulse about 10 to 12 times. The mixture should resemble coarse cornmeal.

3. In a small bowl, whisk together the pumpkin puree, egg, and vanilla extract until smooth.

4. Pour the flour mixture into the large mixing bowl and add the raisins. Stir in the pumpkin mixture until large dough clumps form. Press it all together with a spatula, making sure you don’t have any loose bits of flour.

5. Flour your hands well. Place the dough on a lightly floured surface and pat into an 8-inch circle about 3/4-inch thick. Brush milk on the top and sprinkle with cinnamon and sugar mix.

6. Cut into 8 triangles and place them on the prepared baking sheet about 1 inch apart. Bake until golden, about 15 to 17 minutes. Cool on the baking sheet for 5 minutes and serve warm or at room temperature.

Tuesday, November 16, 2010

Pasta Sauce, with hidden vegetables

Ceci enjoying one of her favorite meals, at The Old Spaghetti Factory, this kid LOVES pasta and sauce!
I've mentioned this before, but my darling sweet daughter Ceci, refuses to eat vegetables.  I'm lucky if I can get her to willingly eat 1/8 of a baby carrot per day, so I have to get creative and hide veggies in foods that she is willing to eat without noticing.  One of her most favorite meals is noodles with sauce, she will eat it until she explodes, and then have another bowl.  She also refuses to eat beef, I don't force it on her at all, most days we give her some sort of chicken if we are eating beef, but apparently pasta sauce is an acceptable way to consume beef in her opinion.

Last week I made a huge pot of Pasta sauce for dinners, we don't mind left overs here and try to get a few dinners out of each meal to ease our schedule.  I managed to hide a zucchini and a half and several baby carrots shredded and ground up in the sauce, and Ceci was none the wiser, and happy to have her favorite meal for several days in a row.  I was happy to have something that she would gladly eat, and to not have to cook multiple nights in a row.  The fact that she got some veggies in her just made it that much better.

I can't say that it was a very remarkable Pasta sauce, but it tasted good, was filling, and had extra healthy stuff in it.  Can't go wrong with that combination.  Here's how I did it, and you should read this more as a guide than a true recipe, feel free to add in different veggies or spices.

Pasta Sauce with Hidden Vegetables

2   lbs of Ground Beef
1   large Onion, chopped
1-2 small-medium Zucchini, shredded
15  Baby carrots, shredded
2   22 oz cans Crushed Tomatoes
2  tsp Kosher Salt
2  tsp Pepper
1   tsp Dried Oregano
1   tsp Dried Basil
1  Beef Bullion Cube

Directions:

Delicious veggie mush!
In a large stock pot, brown ground beef, if using low fat beef, add a tablespoon or two of oil to prevent burning.  When the beef is cooked, remove it from the pan and set aside.  Place Onion, Zucchini and Carrots into pot and saute until softened.

Place cooked veggies into food processor and grind up to a thick slurry, this will allow it to blend into the sauce better and be less perceptible to picky eaters.  If you don't mind the shreds and chunks of veggies, you can skip the food processor.

Return the veggie mix to the pot along with the ground beef, and pour in the cans of crushed tomatoes, and stir to combine.  Add in the herbs and spices, stir and let simmer.  Use a clean teaspoon and taste, add more seasoning to taste.  I tend to be very light handed with the seasoning while my husband Tim is very heavy handed, some how we find a balance.  You will have to taste because some canned tomatoes are pre-seasoned while others are plain.

Boil Gluten Free noodles according to package, and drain off water.  If Pasta sauce seems to thick you can add some pasta water to thin it down.  Then pour a heaping ladle full of sauce over a bowl of pasta, and sprinkle with Parmesan cheese.  You can also serve with garlic toast if you like, I'm lazy and toast a slice of bread, butter it, and sprinkle with garlic salt.  Definitely a favorite meal for all in this family, I hope your family enjoys it too.

Monday, November 15, 2010

Link For Gluten Free Thanksgiving

If you are someone with Celiac Disease, or eat gluten free, or are at all curious about gluten free food, you have to check out The Gluten Free Girl and the Chef.  She has some amazing ideas, including this week's post for a Gluten Free Thanksgiving, so many incredible recipes compiled in one place.  I can't wait to try some, I think the pumpkin scones are calling my name.  Hope you are all inspired to have a delicious Gluten Free Thanksgiving dinner!

Friday, November 12, 2010

Gluten-Free Chocolate Decadence Pecan Cookies

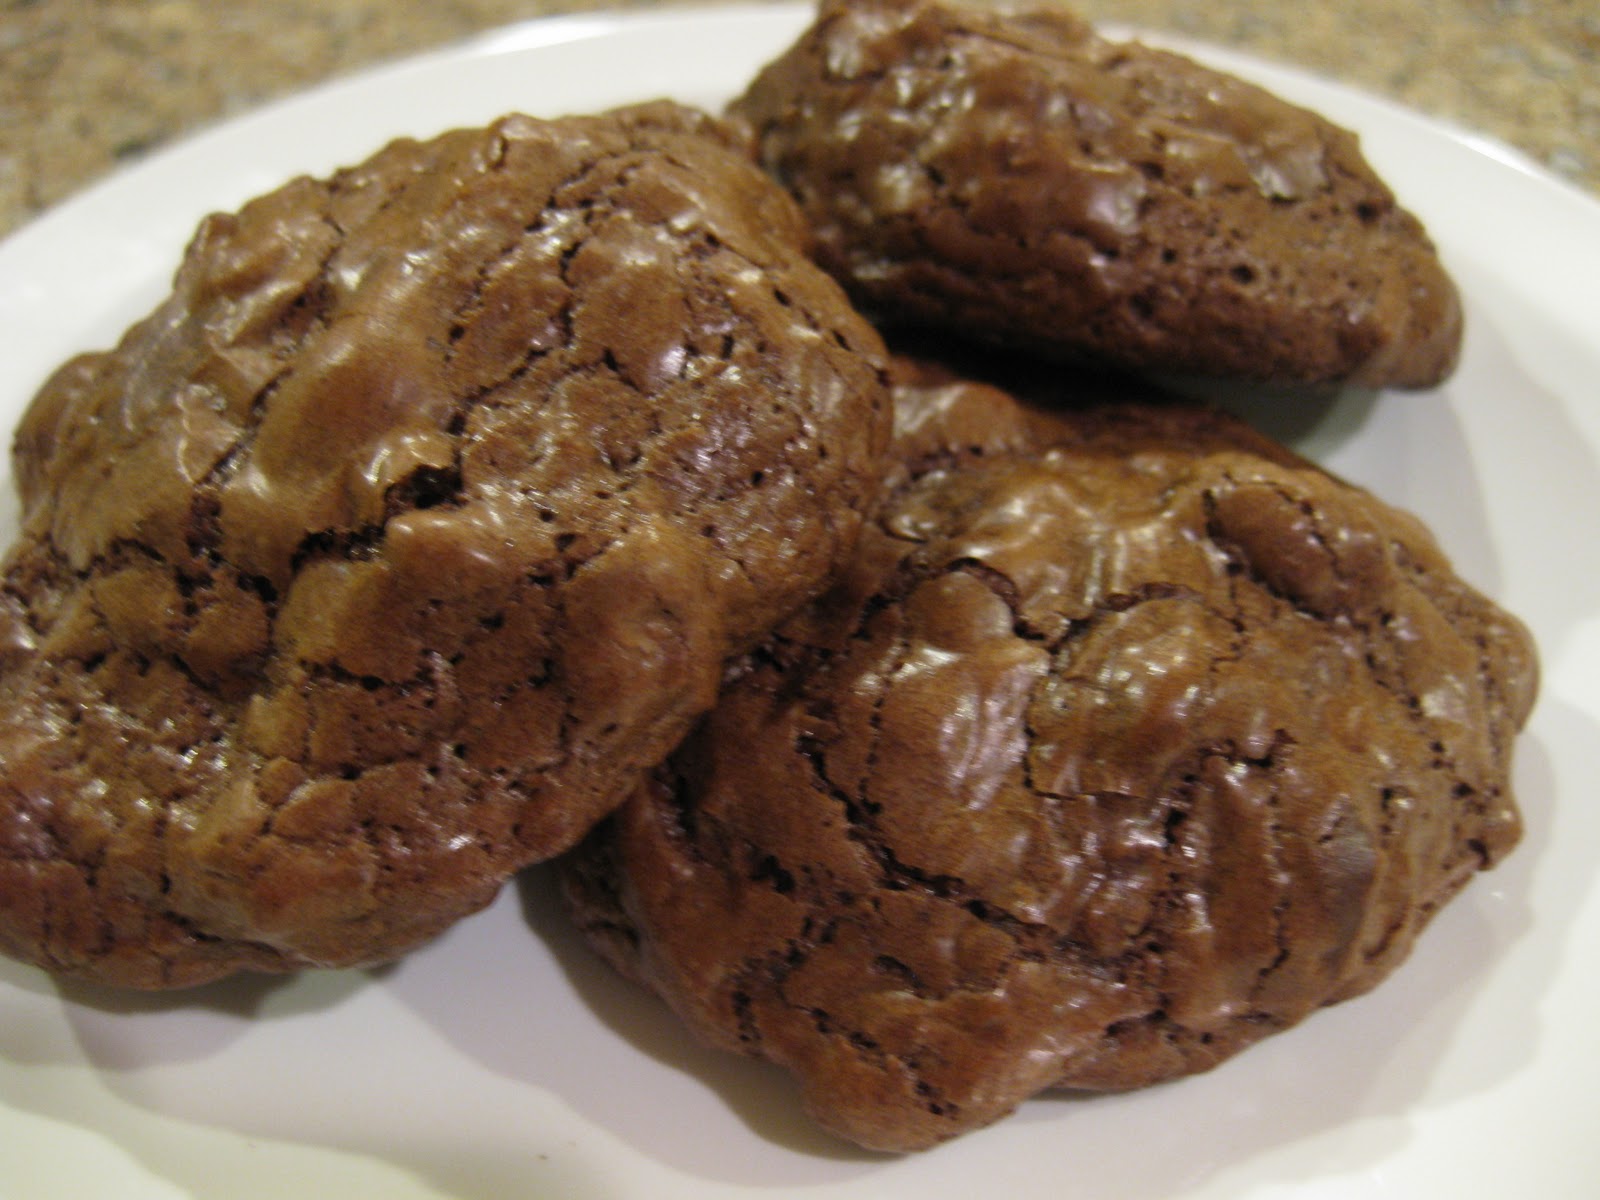
Amazingly good!

I saw this post Cookies Everyone will Love, the other day on my facebook news feed, when I opened it up and saw the first cookie picture I was so excited.  I used to get a similar cookie from Whole Foods bakery that was so delicious, but I don't go to Whole Foods very often these days.  The biggest problem with the whole foods cookies is that it is not a dedicated GF bakery so even with my lack of sensitivity to gluten right now I still worry that some uneducated person knocked some wheat flour into the mixer.  Plus why spend money when you can make it even more delicious at home.

One great thing about making these cookies was, I had all the ingredients in the cabinet, a few months ago I had made a Flourless Chocolate Cake from Food Network that called for bittersweet chocolate (I'll discuss that in another post, suffice to say it was incredibly delicious).  I did have to buy the pecans, but with the holidays coming they will be in good use around this house.

I'm pretty spastic when it comes to reading recipes off the computer but I really wanted these cookies, so I started making them.  Thank Goodness my husband and in-laws were home because I had to send Ceci away while I was making them.  The steps got a bit convoluted and I was really stressed out while making them, and having a toddler eating raw flour sitting on the counter does not lower my stress level. One thing I will change in the future is to toast the nuts prior to making the cookies, instead of trying to manage them while working the cookie batter.

 I have simply tidied up the formatting of the previous post so it is a bit more fluid to read, I also looked at the original recipe from LemonPi and gained a little inspiration.  I tried to simplify the mixing process to exclude the double boiler, but was unsuccessful, the double boiler stays, sorry.  I was really hopeful to be able to a few less dishes.

To give you an idea of what you are headed for when you finish making these cookies, they can only be described as the brownie of the cookie world, and the perfect brownie at that!  There is a light crispy outside crust, protecting an amazing chewy tender inside, and filled with toasted pecans,  they are perfectly delicious!

I can just finished a second batch today and it was much easier to make the second time around, I also used coffee instead of vanilla.  I can't say that I taste coffee, but I think the chocolate flavor is enhanced, I think it might be a keeper of a tweak on the old recipe.


Gluten-Free Chocolate Decadence Pecan Cookies
Adapted from Alice Currah's  Adapted from LemonPi and based on Alice Medrich’s recipe from Bittersweet

INGREDIENTS:

1/4  Cup sweet rice flour
1/4  tsp baking powder
1/4  tsp salt

8    ounces bittersweet chocolate chips (about 1 1/2 Cups)
2    Tbs unsalted butter

2    large eggs
1/2 Cup sugar
2     tsp pure vanilla extract (or coffee, or OJ (no pulp), or flavored liquor)

1 1/2 Cups toasted pecans, coarsely chopped
6     ounces semi-sweet chocolate chips (about 1 Cup)

2 sheets parchment paper


DIRECTIONS:

Preheat oven to 350 degrees F.

In a small bowl, mix the flour, baking powder, and salt together, set aside.

Place bittersweet chocolate chips and butter in a medium to large microwave-safe bowl and heat for 1 minute. Stir the chocolate butter mixture and microwave again for 30 seconds. Repeat this until all the chocolate chips have melted and the mixture is smooth, set aside.

Using a double boiler or make your own double boiler whisk the eggs, sugar, and vanilla thoroughly in the top bowl/pan over simmering water in the bottom pan.  Whisk egg mixture until it is lukewarm and then add it to the chocolate mixture, stirring until everything is well combined.  If eggs are not warm when you add them to the warm chocolate, the chocolate will cook the eggs and be a horrible mess of chocolate scrambled eggs.

Add the flour mixture, semi-sweet chocolate chips, and pecans to the chocolate mixture. Your batter will look like thick cake batter. Do not fear, after they bake they will look like and taste like cookies!

Scoop dough (it will look very wet and sloppy) into rounded tablespoons (I used a small cookie scooper) on a cookie sheet lined with parchment paper 2 inches apart from each other. Bake for 12 minutes until the surface of the cookies look dry and set.

Remove the cookies from the oven, with the cookies still on the parchment paper, slide the paper onto racks to cool. If you leave the cookies and the paper on the cookie sheets the cookies will continue to bake, and be dried out.  Gently peel the parchment paper back after cookies have cooled for at least 30 minutes. If you can wait that long to start eating them, I certainly can't.

Some serving suggestions for you to consider Peppermint ice cream and chocolate sauce.
Or, as we discovered tonight they make FABULOUS ice cream sandwich cookies!  with Pumpkin Ice cream, Yummmm...... 

Roasted Brussels Sprouts

Roasted Brussels Sprouts!

I know what you might think, Brussels Sprouts Ewww!  And to that I say, then who ever cooked the Brussels Sprouts you ate was mean.  Tim and I found the deliciousness of Brussels Sprouts last year, I had seen more and more TV chefs using them and we were very curious why so many trained chefs would be using a veggie with such a bad reputation.  I got a small pack from the grocery store and Tim sauteed them and they were sooooo good!  I kid you not they taste like veggie candy to me!  Toasty and almost sweet, but with the salt and oil on them, I guess they might be the kettle corn of the vegetable world if I had to describe it.  When sauteed or roasted their natural sweetness comes out and they are just amazingly good.  We prefer ours a little underdone so they still resemble Brussels sprouts, you can cook them longer, but then they start to have an acrid burned taste to them which I can't stomach.

This weekend I found a huge bag of sprouts at Costco, 2 lbs to be exact, and brought them home.  Usually when we find them in the regular supermarket they are a 10-12 ounce package, which is fine if you only want to eat 4 sprouts each.  So finding this huge bag was great!  Usually Tim does the sauteing and since he does such a great job, I'm afraid to do it now.  I'm such a chicken when it comes to cooking.  I love baking but cooking drives me wild.  Then out of no where Food Network posts a roasted Brussels sprouts recipe on facebook yesterday, as if they knew I needed it.  I did tweak it a little to suit our tastes better.

I couldn't have been happier with how they came out, if I hadn't had such a delicious Shepard's pie to eat, I could have eaten a whole bowl of these Brussels sprouts.  One exceptionally important bit of information about Brussels sprouts, no matter how you choose to cook them, NEVER EVER Reheat them!!!  We tried heating leftovers one time and I gagged.  This may be why some of you think you don't like sprouts, they are AWFUL when reheated I'm sure it has something to do with the fact that they are in the cabbage family, and all the gasses they release, I couldn't say definitely.  Just a word of advice for you, don't boil them or reheat them, those are the horrible flavors that everyone thinks of when they hear the words Brussels sprouts.  


With all that said, if you cook them right they are delicious, and down right addictive.  So here goes, I adapted Ina Garten's recipe yesterday and came up with this.


Roasted Brussels Sprouts


Brussels Sprouts (Enough for one meal, with no left overs, about a handful per person)
Olive Oil
Kosher Salt
White Pepper


Preheat oven to 400 degrees (F).  Prep Brussels Sprouts by trimming off the base ends just enough to get the dried or browned portion off, and remove any yellow or damaged leaves, and cut in half.  Place halved Brussels sprouts on a rimmed sheet pan, drizzle with olive oil, sprinkle with kosher salt and white pepper.  Use your hand to stir the sprouts around on the pan to mix and coat them.  Place pan in oven for 22 min, shake pan half way through roasting if desired.  Remove from oven and serve immediately, giving a few minutes so they don't burn your mouth, but certainly don't eat them cold.
Brussels Sprouts on the cookie sheet just after being removed from oven


Try them tonight and rethink your opinions of Brussels Sprouts!